OVFTool を使った OVF テンプレートのエクスポート/インポート
手順について記載します。
OVF Tool のインストール
OVFTool は以下 VMware Customer Connect より、VMware vSphere
のダウンロードページを開き、[Drivers & Tools] タブ →
[Automation Tools and SDK(s)] から、ダウンロードすることが可能です。
Download VMware vSphere
https://customerconnect.vmware.com/en/downloads/info/slug/datacenter_cloud_infrastructure/vmware_vsphere/7_0#drivers_tools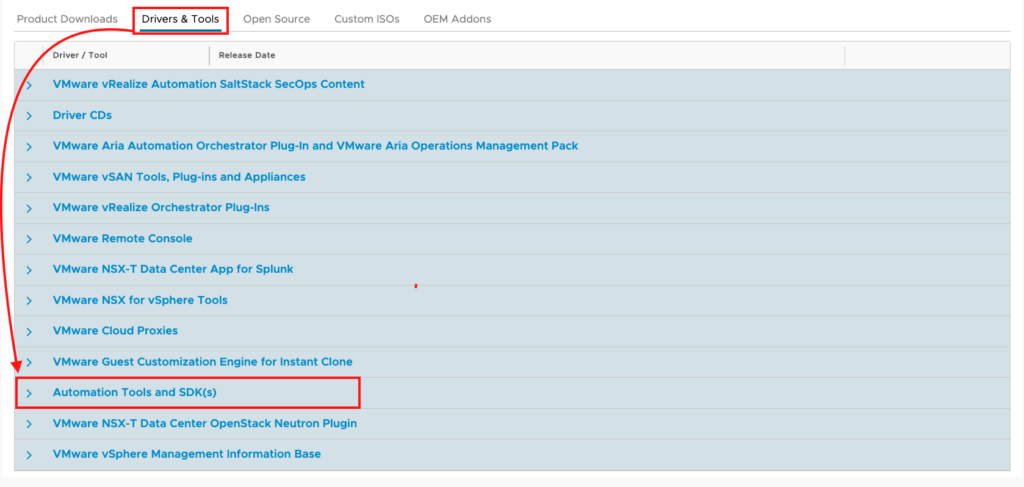
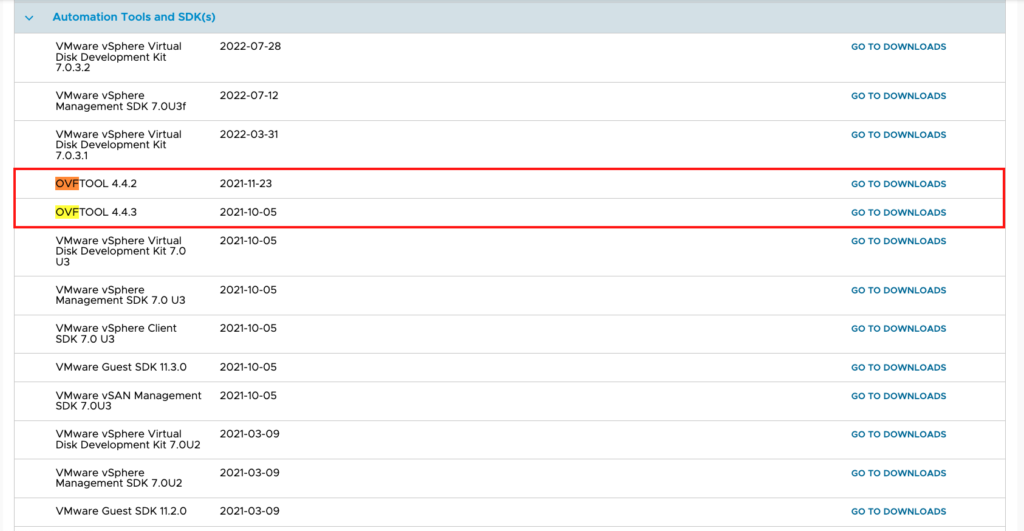
今回は Windows OS に OVFTool 4.4.3 をダウンロードするため、上記画像
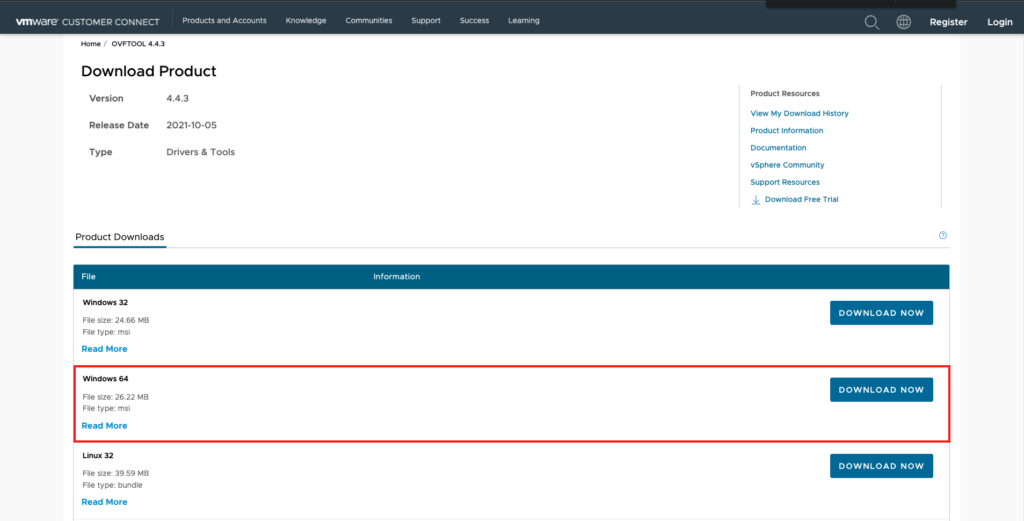
の [GO TO DOWNLOADS] をクリックし、以下画像の通り [Windows 64]
から [DOWNLOAD NOW] をクリックします。
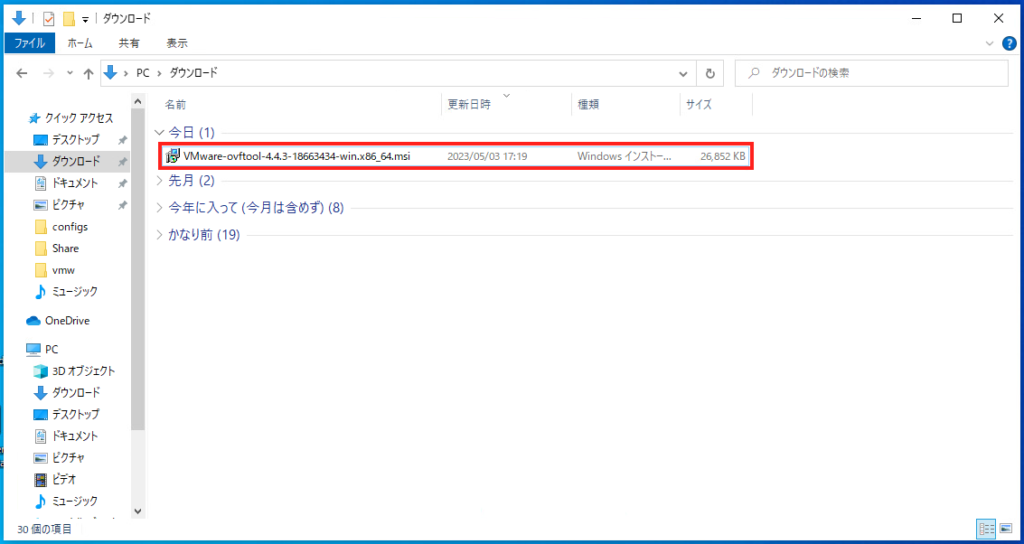
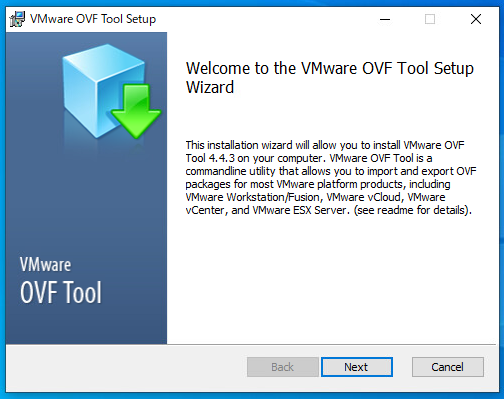
ダウンロードされたインストーラーを開きます。
[Next] をクリックします。
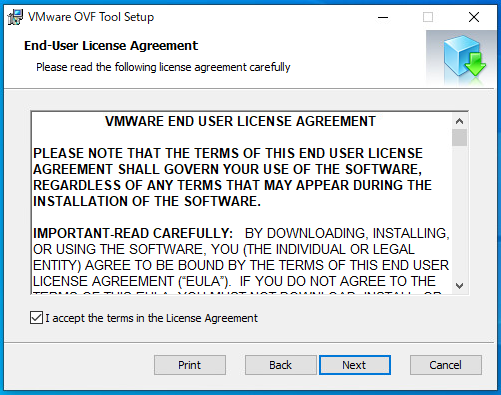
[I Accept the terms in the License Agreement] にチェックを入れ、
[Next] をクリックします。
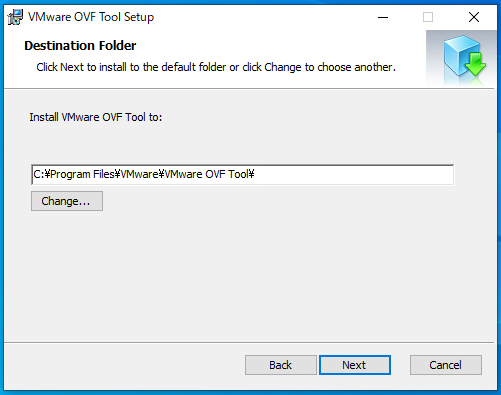
[Next] をクリックします。
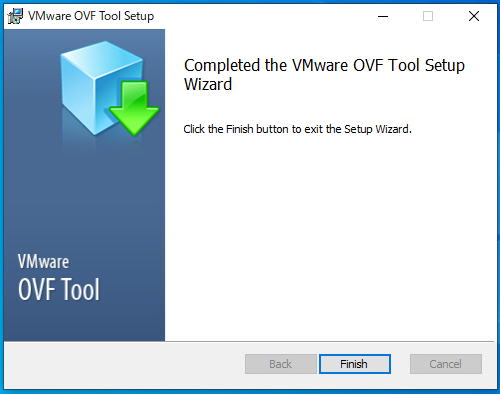
[Install] をクリックします。
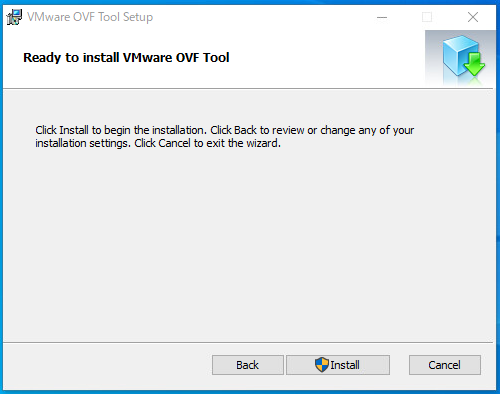
以上でダウンロードは完了です。
OVFTool を使用した OVF テンプレートのエクスポート
まずは、コマンドプロントにて OVFTool のインストールフォルダへ
移動します。
C:\Users\SS>cd C:\Program Files\VMware\VMware OVF ToolOVFTool を使用して、OVF テンプレートのエクスポートを実施する
場合は、以下のコマンドにて可能です。
ovftool.exe --noSSLVerify vi://<ESXiのユーザー名>:<ESXiのパスワード>@<ESXiのホスト名 or IPアドレス>/<仮想マシン名> <クライアント端末上での保存先>実際にコマンドを実行すると以下のようになります。
C:\Program Files\VMware\VMware OVF Tool>ovftool.exe --noSSLVerify vi://root:Passw0rd@192.168.0.27/Win2016-test C:\Users\SS\Downloads
Opening VI source: vi://root@192.168.0.27:443/Win2016-test
Opening OVF target: C:\Users\SS\Downloads
Writing OVF package: C:\Users\SS\Downloads\Win2016-test\Win2016-test.ovf
Transfer Completed
Completed successfully[Completed successfully] が出力されれば、エクスポートが完了です。
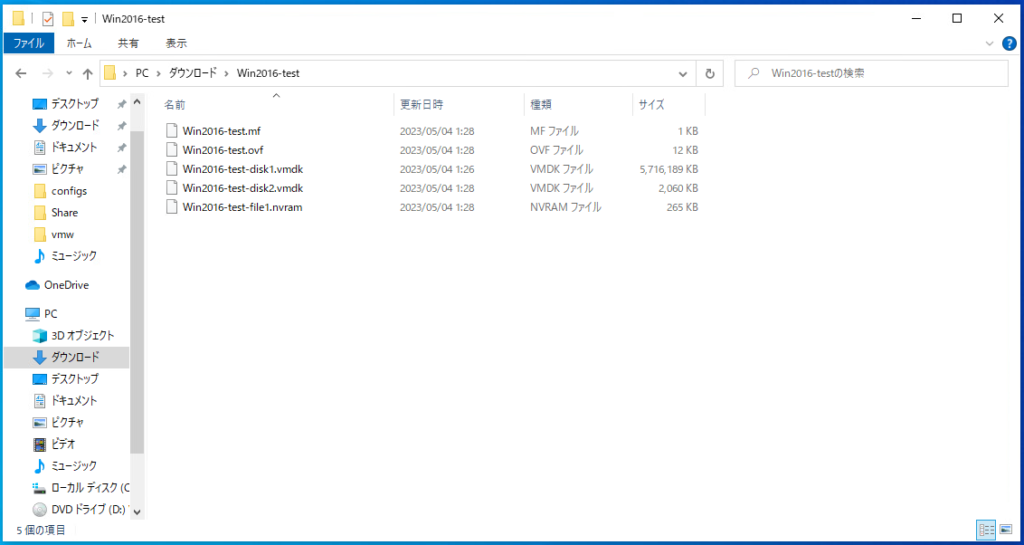
クライアント端末上で指定した保存先を確認してみると、各種ファイル
がエクスポートされていることが確認できます。
なお、OVF テンプレートのエクスポートにあたり、以下のような点に
ついて注意ください。
・OVF テンプレートのエクスポートにあたり、対象の仮想マシンは停止する必要があります。
・スナップショットが仮想マシンに構成されている場合は、統合された状態でエクスポートされます。
・RDM ディスクが構成されている場合は仮想ディスクに変換された状態でエクスポートされます。OVFTool を使用した OVF テンプレートのデプロイ方法
OVFTool を使用して、OVF テンプレートのデプロイを実施する
場合は、以下のコマンドにて可能です。
<デプロイ先の ESXi が vCenter Server に管理されている場合>
ovftool.exe -ds=<保存先データストア名> -dm=<ディスクフォーマット(thin/thick/eagerZeroedThick)> -nw=<ポートグループ名> -n=<デプロイする仮想マシン名> <対象のOVFファイルのパス> vi://<vCenter Serverのユーザー名>:<vCenter Serverのパスワード>@<vCenter Serverのホスト名 or IPアドレス>/<デプロイ先ESXiが存在するデータセンターの名前>/host/<デプロイ予定のESXiが存在するクラスタ名>/<デプロイ予定のESXiのホスト名 or IPアドレス><デプロイ先の ESXi が vCenter Server に管理されていない場合>
ovftool.exe -ds=<データストア名> -dm=<ディスクフォーマット(thin/thick/eagerZeroedThick)> -nw=<ポートグループ名> -n=<デプロイする仮想マシン名> <対象のOVFファイルのパス> vi://<デプロイ予定のESXiのユーザー名>:<デプロイ予定のESXiのパスワード>@<デプロイ予定のESXiのホスト名 or IPアドレス>今回検証に使っている ESXi は vCenter Server に管理されているため、
以下コマンドを実行し OVF テンプレートのデプロイを実施しました。
C:\Program Files\VMware\VMware OVF Tool>ovftool.exe --noSSLVerify -ds=datastore1 -dm=thin -nw="VM Network" -n=Win2016OVFTool C:\Users\SS\Downloads\Win2016-test\Win2016-test.ovf vi://administrator@vsphere.local:Pass0wrd@192.168.0.17/Datacenter/host/cluster/192.168.0.21
Opening OVF source: C:\Users\SS\Downloads\Win2016-test\Win2016-test.ovf
The manifest validates
Opening VI target: vi://administrator%40vsphere.local@192.168.0.17:443/Datacenter/host/cluster/192.168.0.21
Deploying to VI: vi://administrator%40vsphere.local@192.168.0.17:443/Datacenter/host/cluster/192.168.0.21
Transfer Completed
Completed successfully[Completed successfully] の出力が確認できれば、完了です。
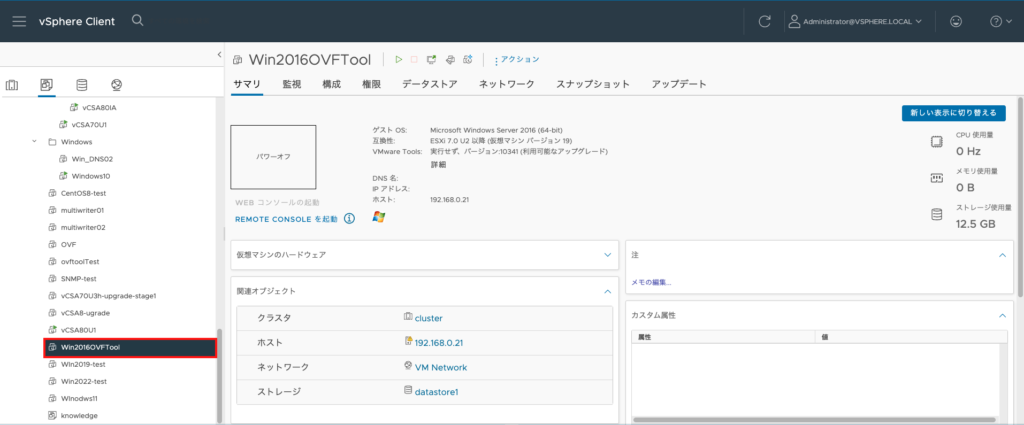
vSphere Client からも確認してみると、ちゃんとデプロイされて
いることが確認できました。
[番外編] ESXi <—> ESXi 間で直接コピーする
上述で案内した手順では、OVF テンプレートのエクスポート -> クライアント
端末に保存 -> OVF テンプレートのデプロイ といった流れでの操作となります。
以下に案内する手順では ESXi -> ESXi で、OVFTool を使用しクライアント
端末を経由せずに、ESXi 間で直接仮想マシンをコピーする方法について記載
します。
コマンドは以下となります。
ovftool.exe --noSSLVerify -ds=<保存先データストア名> -dm=<ディスクフォーマット(thin/thick/eagerZeroedThick)> -nw=<ポートグループ名> -n=<デプロイする仮想マシン名> vi://<ESXiのユーザー名>:<ESXiのパスワード>@<ESXiのホスト名 or IPアドレス>/<コピー対象の仮想マシン名> vi://<vCenter Serverのユーザー名>:<vCenter Serverのパスワード>@<vCenter Serverのホスト名 or IPアドレス>/<デプロイ予定のESXiが存在するデータセンターの名前>/host/<デプロイ予定のESXiが存在するクラスタ名>/<デプロイ予定のESXiのホスト名 or IPアドレス>実際にコマンドを実行すると以下のようになります。
C:\Program Files\VMware\VMware OVF Tool>ovftool.exe --noSSLVerify -ds="Datastore_Test" -dm=thin -nw="VM Network" -n=WinOVFTool vi://root:Pass0wrd@192.168.0.27/Win2016-test vi://administrator@vsphere.local:Pass0wrd@192.168.0.150/Datacenter/host/cluster01/ss046.home.com
Opening VI source: vi://root@192.168.0.27:443/Win2016-test
Opening VI target: vi://administrator%40vsphere.local@192.168.0.150:443/Datacenter/host/cluster01/ss046.home.com
Deploying to VI: vi://administrator%40vsphere.local@192.168.0.150:443/Datacenter/host/cluster01/ss046.home.com
Transfer Completed
Completed successfully<参考>
Quick Tip - Easily move or copy VMs between two Free ESXi hosts?
https://williamlam.com/2023/01/quick-tip-easily-move-or-copy-vms-between-two-free-esxi-hosts.html参考
OVF Tool Command Syntax to Export and Deploy OVA/OVF Packages (1038709)
https://kb.vmware.com/s/article/1038709?lang=en_us
OVF Tool User’s Guide
https://developer.vmware.com/docs/11747/ovf-tool-user-s-guide/GUID-5F65CBA6-270D-4F19-9AE4-EAAA0FE82E0B.html
C:\Program Files\VMware\VMware OVF Tool>ovftool.exe -h
Usage: ovftool [options] <source> [<target>]
where
<source>: Source URL locator to an OVF package, VMX file, or virtual machine in
vCenter or on ESX Server.
<target>: Target URL locator which specifies either a file location, or a
location in the vCenter inventory or on an ESX Server.
If <target> is not specified, information about the source is displayed to the
console.
Options:
--acceptAllEulas : Accept all end-user licenses agreements
without being prompted.
--allowAllExtraConfig : Whether we allow all the ExtraConfig
options. These options are a security risk
as they control low-level and potential
unsafe options on the VM.
--allowExtraConfig : Whether we allow ExtraConfig options. These
options are a security risk as they control
low-level and potential unsafe options on
the VM.
--annotation : Add annotation to vi, vmx, vapprun, vCloud,
OVF, and OVA source locators
--authdPortSource : Use this to override default vmware authd
port (902) when using a host as source.
--authdPortTarget : Use this to override default vmware authd
port (902) when using a host as target.
--chunkSize : Specifies the chunk size to use for files in
a generated OVF package. The default is not
to chunk. The chunk size without unit is
assumed to be in megabytes. Accepted units
are b, kb, mb, gb; e.g., 2gb or 100kb.
--compress : Compress the disks in an OVF package. Value
must be between 1 and 9. 1 is the fastest,
but gives the worst compression, whereas 9
is the slowest, but gives the best
compression.
--computerName : Sets the computer name in the guest for a VM
using the syntax --computerName:<VM
ID>=<value>. Only applies to vCloud targets
version 5.5 or newer.
--configFile : Configuration file to use to load options
from.
--coresPerSocket : Specifies the distribution of the total
number of CPUs over a number of virtual
sockets using the syntax
--coresPerSocket:<VM ID>=<value>. Only
applies to vCloud targets version 5.5 or
newer.
-ds/--datastore : Target datastore name for a VI locator.
--decodeBase64 : Decode option values with Base64.
--defaultStorageProfile : The storage profile for all VMs in the OVF
package. The value should be an SPBM profile
ID. Only applies to VI targets version 5.5
or newer.
--defaultStorageRawProfile : The storage profile for all VMs in the OVF
package. The value should be raw SPBM
profile. The value will overwrite that in
--defaultStorageProfile. Only applies to VI
targets version 5.5 or newer.
--deploymentOption : Selects what deployment option to use (if
the source OVF package supports multiple
options.)
--disableVerification : Skip validation of signature and
certificate.
-dm/--diskMode : Select target disk format. Supported formats
are: monolithicSparse, monolithicFlat,
twoGbMaxExtentSparse, twoGbMaxExtentFlat,
seSparse (VI target), eagerZeroedThick (VI
target), thin (VI target), thick (VI
target), sparse, and flat
--diskSize : Sets the size of a VM disk in megabytes
using the syntax --diskSize:<VM ID>,<disk
instance ID>=<value>. Only applies to vCloud
targets version 5.5 or newer.
--eula : EULA to be inserted in the first virtual
system or virtual system collection in the
OVF. If the EULA is in a file, use the
option --eula@=filename instead.
--exportDeviceSubtypes : Enables export of resource subtype for
CD/Floppy/Parallel/Serial devices. This can
limit portability as not all device backings
are supported on all hypervisors. The
default is false.
--exportFlags : Specifies one or more export flags to
control what gets exported. The supported
values for VI sources are mac, uuid, and
extraconfig. Supported value for vCloud
sources are preserveIdentity. One or more
options can be provided, separated by
commas.
--extraConfig : Sets an ExtraConfig element for all
VirtualHardwareSections. The syntax is
--extraConfig:<key>=<value>. Applies to vi,
vmx, vapprun, vCloud, ovf, and ova source
locators.
--fencedMode : If a parent network exists on the vCloud
target, this property specifies the
connectivity to the parent. Possible values
are bridged, isolated, and natRouted.
-h /--help : Prints this message.
--hideEula : In OVF probe mode, hides the EULA.
--importAsTemplate : Import VM as a Template when deployed on a
VI target.
--ipAllocationPolicy : IP allocation policy for a deployed OVF
package.Supported values are: dhcpPolicy,
transientPolicy, fixedPolicy,
fixedAllocatedPolicy.
--ipProtocol : Select what IP protocol to use (IPv4, IPv6).
--lax : Relax OVF specification conformance and
virtual hardware compliance checks. Use only
if you know what you are doing.
--locale : Selects locale for target.
--machineOutput : Output OVF Tool messages in a machine
friendly manner.
--makeDeltaDisks : Build delta disk hierarchy from the given
source locator.
--maxVirtualHardwareVersion : The maximal virtual hardware version to
generate.
--memorySize : Sets the memory size in megabytes of a VM
using the syntax --memorySize:<VM
ID>=<value>. Only applies to vCloud targets
version 5.5 or newer.
--multiDatastore : List of target datastore names for a VI
locator. datastore assignment is set using
the syntax
--mdatastore:<ovf:diskId>=<targetdatastore-name>.
multiple mds parameteres are used to specify
multiple datastore mappings. e.g.
--mdatastore:vmdisk1=datastore1
--mdatastore:vmdisk2=datastore2
The multi datastore flags can not be used
along with --datastore flag.
-n /--name : Specifies target name (defaults to source
name).
--net : Set a network assignment in the deployed OVF
package. A network assignment is set using
the syntax --net:<OVF name>=<target name>.
If the target is vCloud 5.5 or newer, a
fence mode can also be specified using the
syntax --net:<OVF name>=<target name>,<fence
mode>. Possible fence mode values are:
bridged, isolated, and natRouted.
-nw/--network : Target network for a VI deployment.
--nic : Specifies NIC configuration in a VM using
the syntax --nic:<VM ID>,<index>=<OVF net
name>,<isPrimary>,<ipAddressingMode>,<ipAddress>.
Possible values for ipAddressingMode are:
DHCP, POOL, MANUAL, and NONE. ipAddress is
optional and should only be used when
ipAddressingMode is set to MANUAL. Only
applies to vCloud targets version 5.5 or
newer.
     --noDestinationSSLVerify    : Skip SSL verification for target VI
                                   connections.
     --noDisks                   : Disable disk conversion.
     --noImageFiles              : Do not include image files in destination.
     --noNvramFile               : Do not include nvram file in destination.
     --noProxyVerify             : Skip Proxy SSL verification.
     --noSSLVerify               : Skip SSL verification for VI connections.
     --noSourceSSLVerify         : Skip SSL verification for source VI
                                   connections.
--numberOfCpus : Sets the number of CPUs for a VM using the
syntax --numberOfCpus:<VM ID>=<value>. Only
applies to vCloud targets version 5.5 or
newer.
-o /--overwrite : Force overwrites of existing files.
--packageCert : Package a source OVF files with a
certificate file into an OVA as is with no
modifications.
--parallelThreads : Specifies how many threads should be used
for parallel transfer.
--powerOffSource : Ensures a VM/vApp is powered off before
importing from a VI source.
--powerOffTarget : Ensures a VM/vApp is powered off before
overwriting a VI target.
--powerOn : Powers on a VM/vApp deployed on a VI target.
--preCheck : Require pre check validations before
import/export, default is true
--privateKey : Sign OVF package with the given private key
(.pem file). The file must contain a private
key and a certificate.
--privateKeyPassword : Password for the private key. Should be used
in conjunction with privateKey if the
private key requires password
authentication. If required and not
specified, the tool will prompt for the
password.
--prop : Set a property in the deployed OVF package.
A property is set using the syntax
--prop:<key>=<value>.
--proxy : Proxy used for HTTP[S] access.
--proxyCert : Specify full path to Proxy Certificate.
--proxyNTLMAuth : Enable NTLM authentication for proxy.
--proxyPassword : Proxy password.
--proxyUsername : Proxy user name.
--pullUploadMode : Pull mode used in uploading files to VI
target, i.e. target pulls files.
-q /--quiet : No output to screen except errors.
--requireSignature : Require validation of signature and
certificate.
--schemaValidate : Validate OVF descriptor against OVF schema.
--shaAlgorithm : Select SHA digest algorithm when creating
OVF package. Supported values are SHA1,
SHA256 and SHA512. Default value is SHA256.
--signCommand : User callback to sign a manifest (.mf) file.
The command will take the .mf file as a
single argument and should generate a
complimentary .cert in the same directory.
--skipManifestCheck : Skip validation of OVF package manifest.
--skipManifestGeneration : Skip generation of OVF package manifest.
--sourcePEM : File path to PEM formatted file used to
verify VI connections.
--sourceSSLThumbprint : SSL fingerprint of SOURCE. OVF Tool verifies
the SSL fingerprint it gets from SOURCE if
the value is set.
-st/--sourceType : Explicitly express that source is OVF, OVA,
VMX, VI, vCloud, ISO, FLP, vApprun
--sslCipherList : Use this to override default OpenSSL ciphers
suite.
--sslVersion : Use this to set preferred TLS/SSL version
for HTTPS connections. The valid values are
as following:
TLSv1_0: Set preferred TLS/SSL version to
TLSv1.0.
TLSv1_1: Set preferred TLS/SSL version to
TLSv1.1.
TLSv1_2: Set preferred TLS/SSL version to
TLSv1.2.
--storageProfile : Sets the storage profile for a VM using the
syntax --storageProfile:<VM ID>=<value>.
Only applies to vCloud targets version 5.5
or newer.
--targetPEM : File path to PEM formatted file used to
verify VI connections.
--targetSSLThumbprint : SSL fingerprint of TARGET. OVF Tool verifies
the SSL fingerprint it gets from TARGET if
the value is set.
-tt/--targetType : Explicitly express that target is OVF, OVA,
VMX, VI, vCloud, ISO, FLP, vApprun
--vCloudTemplate : Create only a vApp template. Default value
is false
--vService : Set a vService assignment in the deployed
OVF package. A vService assignment is set
using the syntax
--vService:<dependencyId>=<providerId>.
--verifyOnly : Do not upload the source but only verify it
against the target host. Applies to VI 4
targets only.
--verifyViTargetManifest : Verify Sha1 digest of deployed files on a VI
target.
-v /--version : Prints the version of this tool.
--viCpuResource : Specify the CPU resource settings for
VI-locator targets. The syntax is
--viCpuResource=<shares>:<reservation>:<limit>.
--viMemoryResource : Specify the CPU resource settings for
VI-locator targets. The syntax is
--viMemoryResource=<shares>:<reservation>:<limit>.
-vf/--vmFolder : Target VM folder in VI inventory (relative
to datacenter).
For more help, type: --help <topic>, where topics are:
locators : For detailed source and destination locator syntax
examples : For examples of use
config : For syntax of configuration files
debug : For debug purpose
integration : For a list of options primarily used when ovftool is exec'ed
from another tool or shellscript.


